I was working on a project and my task was to make an appointment system for real estate agents.
The project was a CRM for real estate agencies and they were struggling to keep all their appointments in one place and with a single source of truth.
Of course they could have just used Google Calendar or similar, but then managers would lose the ability to have an overview of their agents' appointments.
My idea was to use the existing backend, written in Laravel adding FullCalendar and Vue.
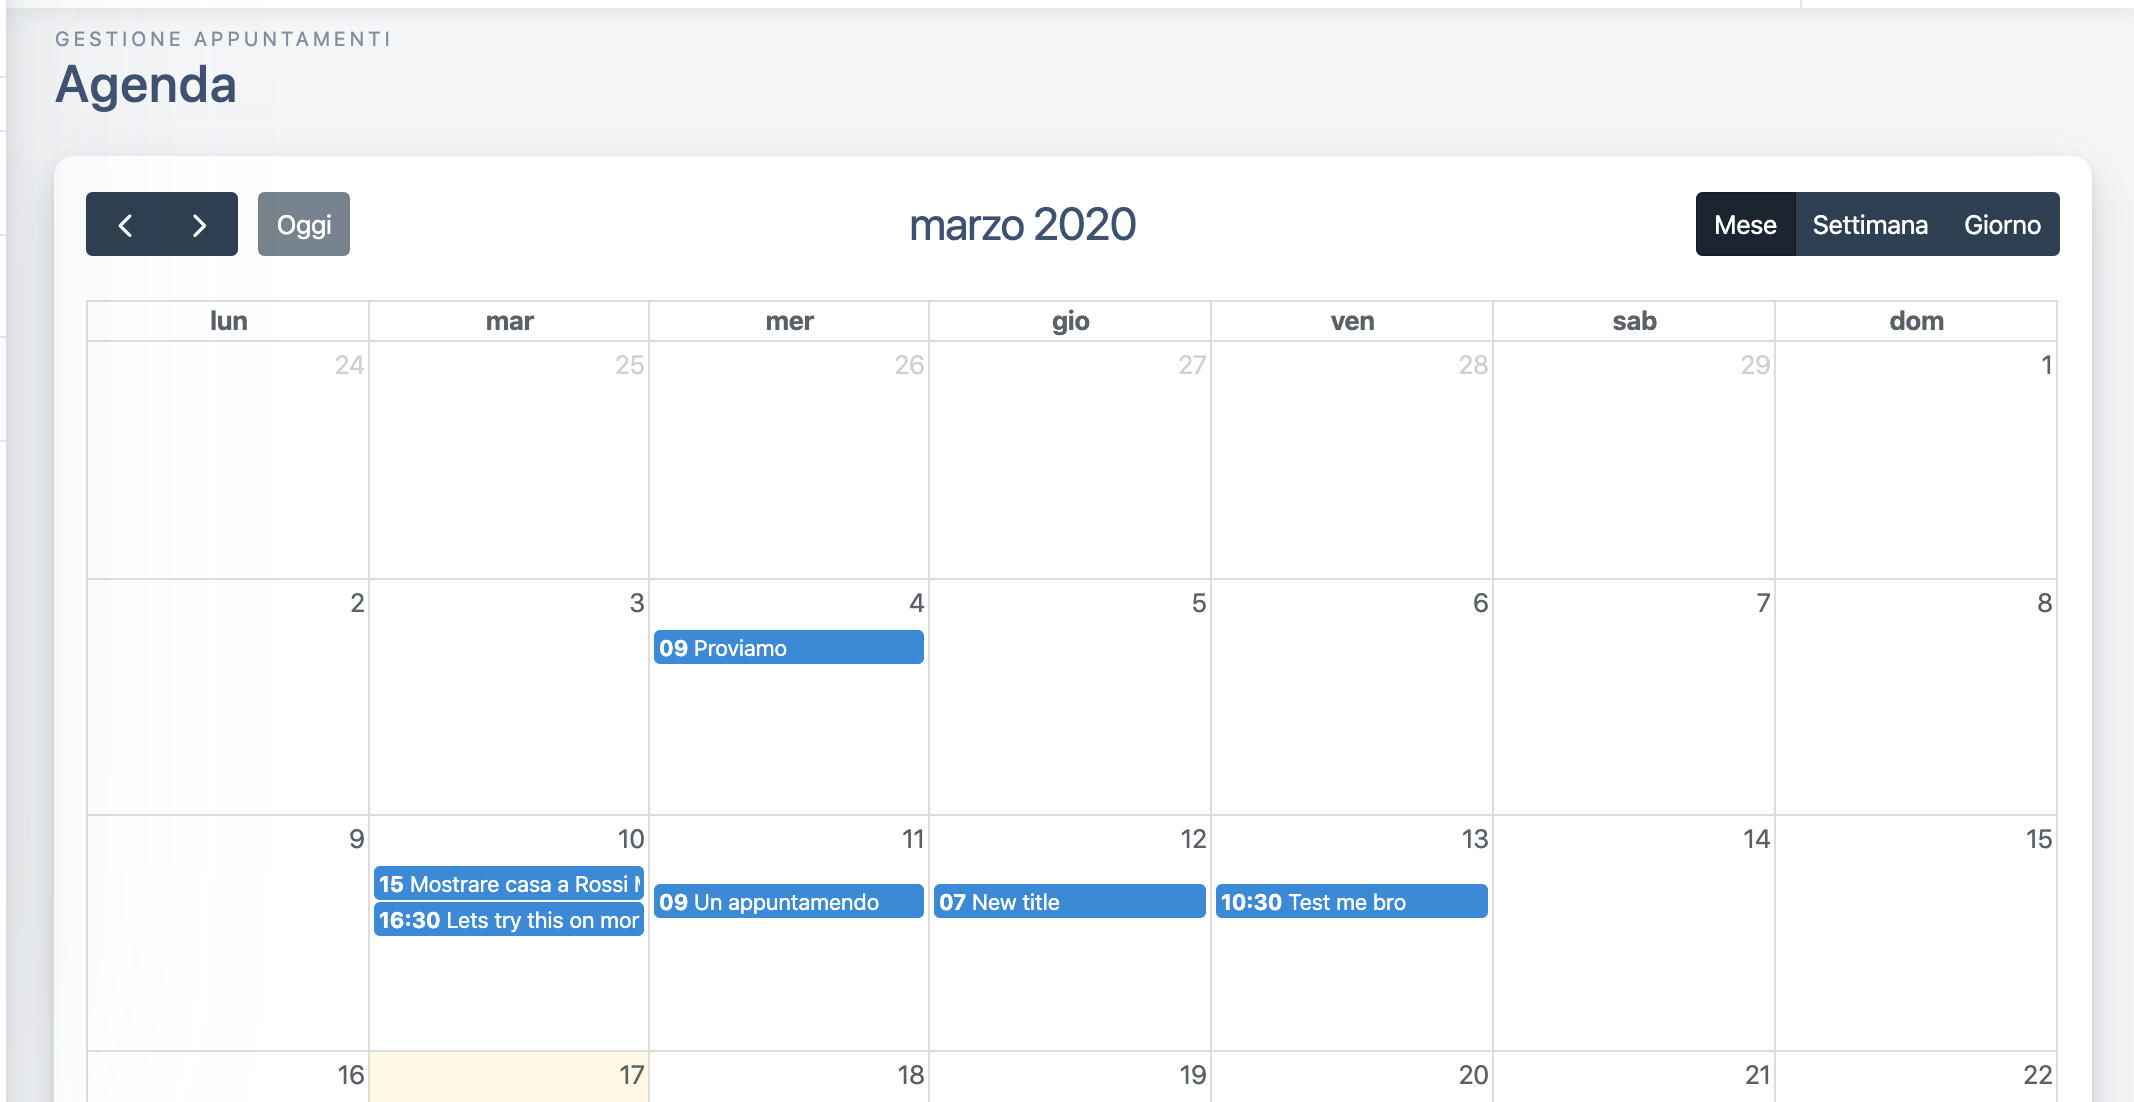
 My customer was Italian, thus the locale in the screenshots.
Let's get started: the backend (Laravel)
I won't go through all the Laravel application scaffolding. You can read about it in the official docs.
Let's assume you already have a Laravel application up and running, with user authentication in place.
Setting up the database: model and migrations
Let's create a new model. I called it Appointment (to avoid confusion with the Laravel native Event).
php artisan make:model Appointment -m -cr
This command will scaffold a new model, a migration and a resourceful controller.
Appointment schema
Let's define how Appointment is structured in our database.
Inside the migration we just created (you can find it in your database/migrations folder):
<?php

use Illuminate\Database\Migrations\Migration;
use Illuminate\Database\Schema\Blueprint;
use Illuminate\Support\Facades\Schema;

class CreateAppointmentsTable extends Migration
{
    /**
     * Run the migrations.
     *
     * @return void
     */
    public function up()
    {
        Schema::create('appointments', function (Blueprint $table) {
            $table->bigIncrements('id');
            $table->timestamps();
            $table->text('title');
            $table->text('description')->nullable();
            $table->dateTime('start');
            $table->dateTime('end');
            $table->integer('user_id')->unsigned();
            $table->foreign('user_id')->references('id')->on('users');
        });
    }

    /**
     * Reverse the migrations.
     *
     * @return void
     */
    public function down()
    {
        Schema::dropIfExists('appointments');
    }
}
You can tweak your Appointment schema according to you needs.
Let's review the one I did.
- A
titlecolumn for the appointment title. This is the text appearing on the event in the calendar. - A
descriptioncolumn for the event details (like location or whatever). This field is optional so I putnullable()on it. startandenddatetime fields.- a foreign index
user_idthat references our userstable.
We can now run this command to migrate our new table structure.
php artisan migrate
Appointment <-> User relationships
Inside app/Http/Appointment.php we need to define the relationship with our User model.
An appointment belongs to one specific user, so we use the belongsTo() relationship.
You can read more about eloquent relationships in Laravel offiical docs.
<?php

namespace App;

use Illuminate\Database\Eloquent\Model;

class Appointment extends Model
{
    protected $guarded = [ 'id' ];

    public function user() {
      return $this->belongsTo('App\User');
    }
}
On the other end, User can have many Appointments.
So inside app/User.php
<?php
/* Add this after your existing code */

public function appointments() {
  return $this->hasMany('App\Appointment');
}
Create, read, index, delete appointments
Ok, now that we have our database and models in place, let's move to application logic.
Keep in mind that I wanted the application to look as much as possible like an SPA.
User just needed to hit the /appointments route and do everything from there, as async as possibile, leveraging axios and Vue.
Routes & endpoints
I avoided the typical Laravel approach (forms, hard page refresh, etc.) and did a small API for calendar CRUD options.
This will get clearer later on in the article where I explain the frontend part.
This is how my routes/web.api looks like (the relevant part):
<?php

/* Other routes here */

Route::get('/appointments', 'AppointmentController@index');
Route::get('/appointments/filter', 'AppointmentController@filter');
Route::post('/appointments/new', 'AppointmentController@store');
Route::patch('/appointments/{appointment}/edit', 'AppointmentController@update');
Route::delete('/appointments/{appointment}', 'AppointmentController@destroy');
Appointments controller & logic handling
Here is my AppointmentController.
<?php

namespace App\Http\Controllers;

use App\Appointment;
use Illuminate\Http\Request;

class AppointmentController extends Controller
{
    /**
     * Display a listing of the resource.
     *
     * @return \Illuminate\Http\Response
     */
    public function index()
    {
        return view('appointments.index');
    }

    /**
     * Store a newly created resource in storage.
     *
     * @param  \Illuminate\Http\Request  $request
     * @return \Illuminate\Http\Response
     */
    public function store(Request $request)
    {
        /* If user is admin asign to specific ID else assign to authUser */
        $assignee =
          ($request->assignee && auth()->user()->isAdmin ?
          $request->assignee :
          $assignee = auth()->user()->id;

        $appointment = new Appointment([
          'start' => $request->start,
          'end' => $request->end,
          'title' => $request->title,
          'description' => $request->description,
          'user_id' => $assignee
        ]);

        $appointment->save();

        return $event;
    }

    /**
     * Display the specified resource.
     *
     * @param  \Illuminate\Http\Request  $request
     * @return \Illuminate\Http\Response
     */
    public function filter(Request $request)
    {
        if (auth()->user()->isAdmin) {
          return Appointment::whereBetween('start', [$request->start, $request->end])
                  ->with('user:id,name,lastname')
                  ->get();
        } else {
          return Appointment::whereBetween('start', [$request->start, $request->end])
                  ->where('user_id', auth()->user()->id)
                  ->get();
        }
    }

    /**
     * Update the specified resource in storage.
     *
     * @param  \Illuminate\Http\Request  $request
     * @param  \App\Appointment  $appointment
     * @return \Illuminate\Http\Response
     */
    public function update(Request $request, Appointment $appointment)
    {
        $user = auth()->user();
        if ($appointment->user_id === $user->id || $user->isAdmin) {
          $appointment->update($request->all());
        } else {
          abort(403);
        }
    }

    /**
     * Remove the specified resource from storage.
     *
     * @param  \App\Appointment  $appointment
     * @return \Illuminate\Http\Response
     */
    public function destroy(Appointment $appointment)
    {
      $user = auth()->user();
      if ($appointment->user_id === $user->id || $user->isAdmin) {
        $appointment->delete();
      } else {
        abort(403);
      }
    }
}
Is User an administrator?
As you can see, in my controller I check if User is an administrator (auth()->user()->isAdmin).
You can achieve this in different ways.
The simplest one would be to add a method inside your User model:
<?php
// Your existing code here

public function isAdmin() {
  return (bool) $this->id === 1;
}
This way only the user with id of 1 has the ability to view and delete every appointment.
Other users can only view, delete and update their personal appointments.
An alternative would be to use a package for roles and permissions management, like Spatie Laravel-Permission package.
A note on filter(Request $request) method inside AppointmentController.
As you will see later on in the article, FullCalendar has its own way of handling fetching events from the backend.
For example if you are in the day view it only fetches appointments of that day's date. If you are in monthly view it fetches all events related to the selected month and so on. Pretty neat, if you ask me.
Frontend: let's display the calendar
Now that we have all the login set up, we are ready to move on the frontend.
As you might have noticed in the routes/web.php, there is only one view responsible for the frontend: resources/views/appointments/index.blade.php.
I will share only the relevant parts of my HTML, yours will depend on your template, theme etc.
@section('content')
<div class="row">
	<div class="col-md-12">
		<div class="card p-3">
            <calendar />
		</div>
	</div>
</div>
@endsection
Ok, pretty straightforward. As you can see it is plain Bootstrap CSS, with a single VueJS component: <calendar />.
If you hit your /appointments route right now, you will see an empty card. That's because we need to create the <calendar /> component.
Let's tackle this one.
Calendar component and FullCalendar
Inside resources/js/components I created a new file, and named it Calendar.vue. Let's leave it empty for now, we'll be back on it later on.
To make your component globally available, add this line to your resources/js/app.js
Vue.component('calendar', require('./components/Calendar.vue').default);Ok, next step is installing FullCalendar. Luckily there is a ready-made integration with Vue, here are the docs in case you might need them for an in-depth overview.
npm install --save @fullcalendar/vue @fullcalendar/core @fullcalendar/daygrid @fullcalendar/timegrid @fullcalendar/interaction
Let's get back to resources/js/components/Calendar.vue.
Here's what it looks like.
<template>
<div>
    <FullCalendar
        ref="fullCalendar"
        defaultView="timeGridDay"
        :options="calendarOptions"
        :header="{
            left: 'prev,next today',
            center: 'title',
            right: 'dayGridMonth,timeGridWeek,timeGridDay,listWeek'
          }"
        :plugins="calendarPlugins"
        :weekends="calendarWeekends"
        :events="calendarEvents"
        @dateClick="handleDateClick"
        @eventDrop="handleEventDrop"
        @eventClick="handleEventClick"
        @eventResize="eventResize"
        :editable="true"
        navLinks="true"
        timeZone="UTC"
    />

    <add-appointment-modal
      :show="new_event_modal_open"
      :date="new_event_details"
      @close="resetNewEventData"
      @event-created="newEventCreated"
    />

    <show-appointment-modal
      :show="show_event_details_modal"
      :event="current_event"
      @close="show_event_details_modal = false"
      @event-deleted="rerenderCalendar"
      @event-updated="rerenderCalendar"
    />

</div>
</template>

<script>
import FullCalendar from "@fullcalendar/vue"
import dayGridPlugin from "@fullcalendar/daygrid"
import timeGridPlugin from "@fullcalendar/timegrid"
import interactionPlugin from "@fullcalendar/interaction"
import AddAppointmentModal from './AddAppointmentModal'
import ShowAppointmentModal from './ShowAppointmentModal'
import Noty from 'noty'

import "@fullcalendar/core/main.css"
import "@fullcalendar/daygrid/main.css"
import "@fullcalendar/timegrid/main.css"

export default {
    name: 'Calendar',
    components: {
        FullCalendar,
        AddAppointmentModal,
        ShowAppointmentModal
    },
    data: () => ({
        new_event_modal_open: false,
        event_detail_modal_open: false,
        new_event_details: {
          start: null,
          end: null,
        },
        current_event: null,
        show_event_details_modal: false,

        /* Full Calendar Options Start */
        calendarPlugins: [
            dayGridPlugin,
            timeGridPlugin,
            interactionPlugin
        ],
        calendarWeekends: true,
        calendarEvents:
          {
            url: '/appointments/filter'
          },
        locale: itLocale,
        calendarOptions: {
            eventLimit: true,
            views: {
                timeGrid: {
                    eventLimit: 4
                },
                monthGrid: {
                    eventLimit: 4
                },
                dayGrid: {
                    eventLimit: 4,
                }
            },
        },
        /* Full Calendar Options End */
    }),

    methods: {
        handleDateClick(e) {
            this.new_event_modal_open = true
            this.new_event_start = e.dateStr
            let endTime = (new Date(e.dateStr)).toISOString()
            this.new_event_details.start = e.dateStr
            this.new_event_details.end = endTime
        },

        handleEventDrop(e) {
            let updatedEventData = {
              start: e.event.start,
              end: e.event.end
            }
            this.$api.appointments.update(e.event.id, updatedEventData)
              .then( ({data}) => {
                new Noty({
                  text: `Event has been updated.`,
                  timeout: 700,
                  type: 'success'
                }).show()
              })
              .catch( error => {
                e.revert()
                new Noty({
                  text: `Oops, something bad happened while updating your event.`,
                  timeout: 1000,
                  type: 'error'
                }).show()
              })
        },

        handleEventClick(e) {
            this.current_event = e.event
            this.show_event_details_modal = true
        },

        formatDate(date) {
          return moment.utc(date).format('DD/MM/YY HH:mm')
        },

        resetNewEventData() {
          this.new_event_details.start = null
          this.new_event_details.end = null
          this.new_event_details.title = null
          this.new_event_modal_open = false
        },

        newEventCreated() {
          this.rerenderCalendar()
          this.new_event_modal_open = false
          this.resetNewEventData()
          new Noty({
            text: `Appointment has been created.`,
            timeout: 1000,
            type: 'success'
          }).show()
        },

        eventResize(e) {
          let updatedEventData = {
            start: e.event.start,
            end: e.event.end
          }
          this.$api.appointments.update(e.event.id, updatedEventData)
            .then( ({data}) => {
              new Noty({
                text: `Appointment duration updated.`,
                timeout: 1000,
                type: 'success'
              }).show()
            })
            .catch( error => {
              e.revert()
              new Noty({
                text: `Oooops, couldn't update appointment duration. Sorry.`,
                timeout: 1000,
                type: 'error'
              }).show()
            })
        },

        rerenderCalendar() {
          this.$refs.fullCalendar.getApi().refetchEvents()
        }
    },
};
</script>

<style>
    .fc-content {
        color: white;
    }
</style>
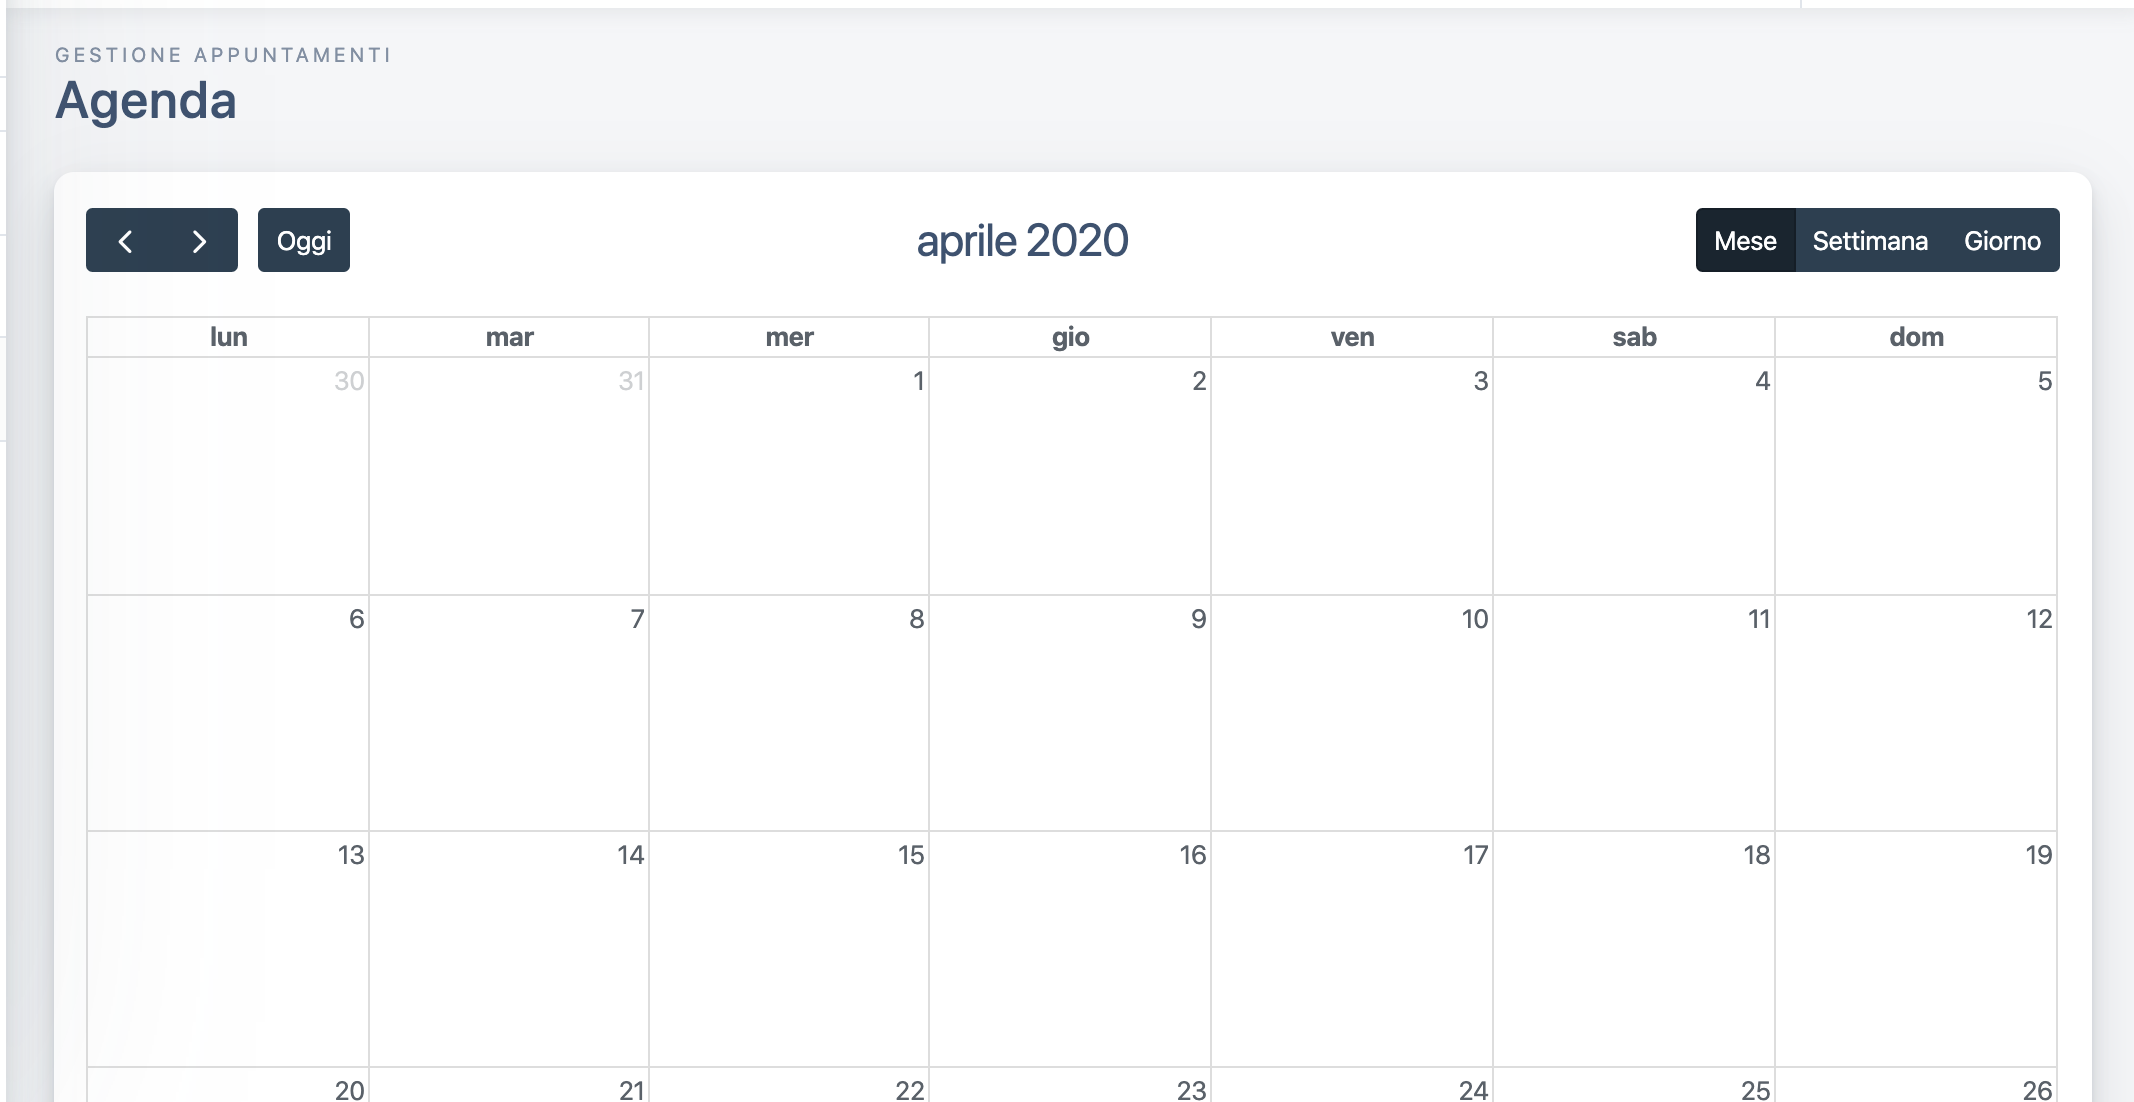
If you fire up Chrome and go to /appointments, this is what you will see.

But right now our calendar doesn't really do much. In fact it only displays an empty calendar, nothing more.
Fetching events on calendar render
As you see, there is prop called events in the FullCalendar component inside our Calendar.vue.
We need to populate the calendar with existing events. Luckily FullCalendar has a built-in logic for that.
We just need to define our endpoint for listing our appointments inside the data() object (I already included that in the snippet I shared with you). Remember the filter() method inside the AppointmentController and the /appointments/filter route? That's what we need them for.
This means that right after we implement event creation, they will immediately be displayed on our calendar. Cool! Let's do it!
Appointment creation
The usual UX for creating a new event. To create an event inside a calendar, you are expected to click on a date or on a time slot, you are redirected to a new page where you input the event title and description.
Finally you submit the form and you get redirected back to your main calendar view.
I think this is BAD UX. It involves a page hard refresh.
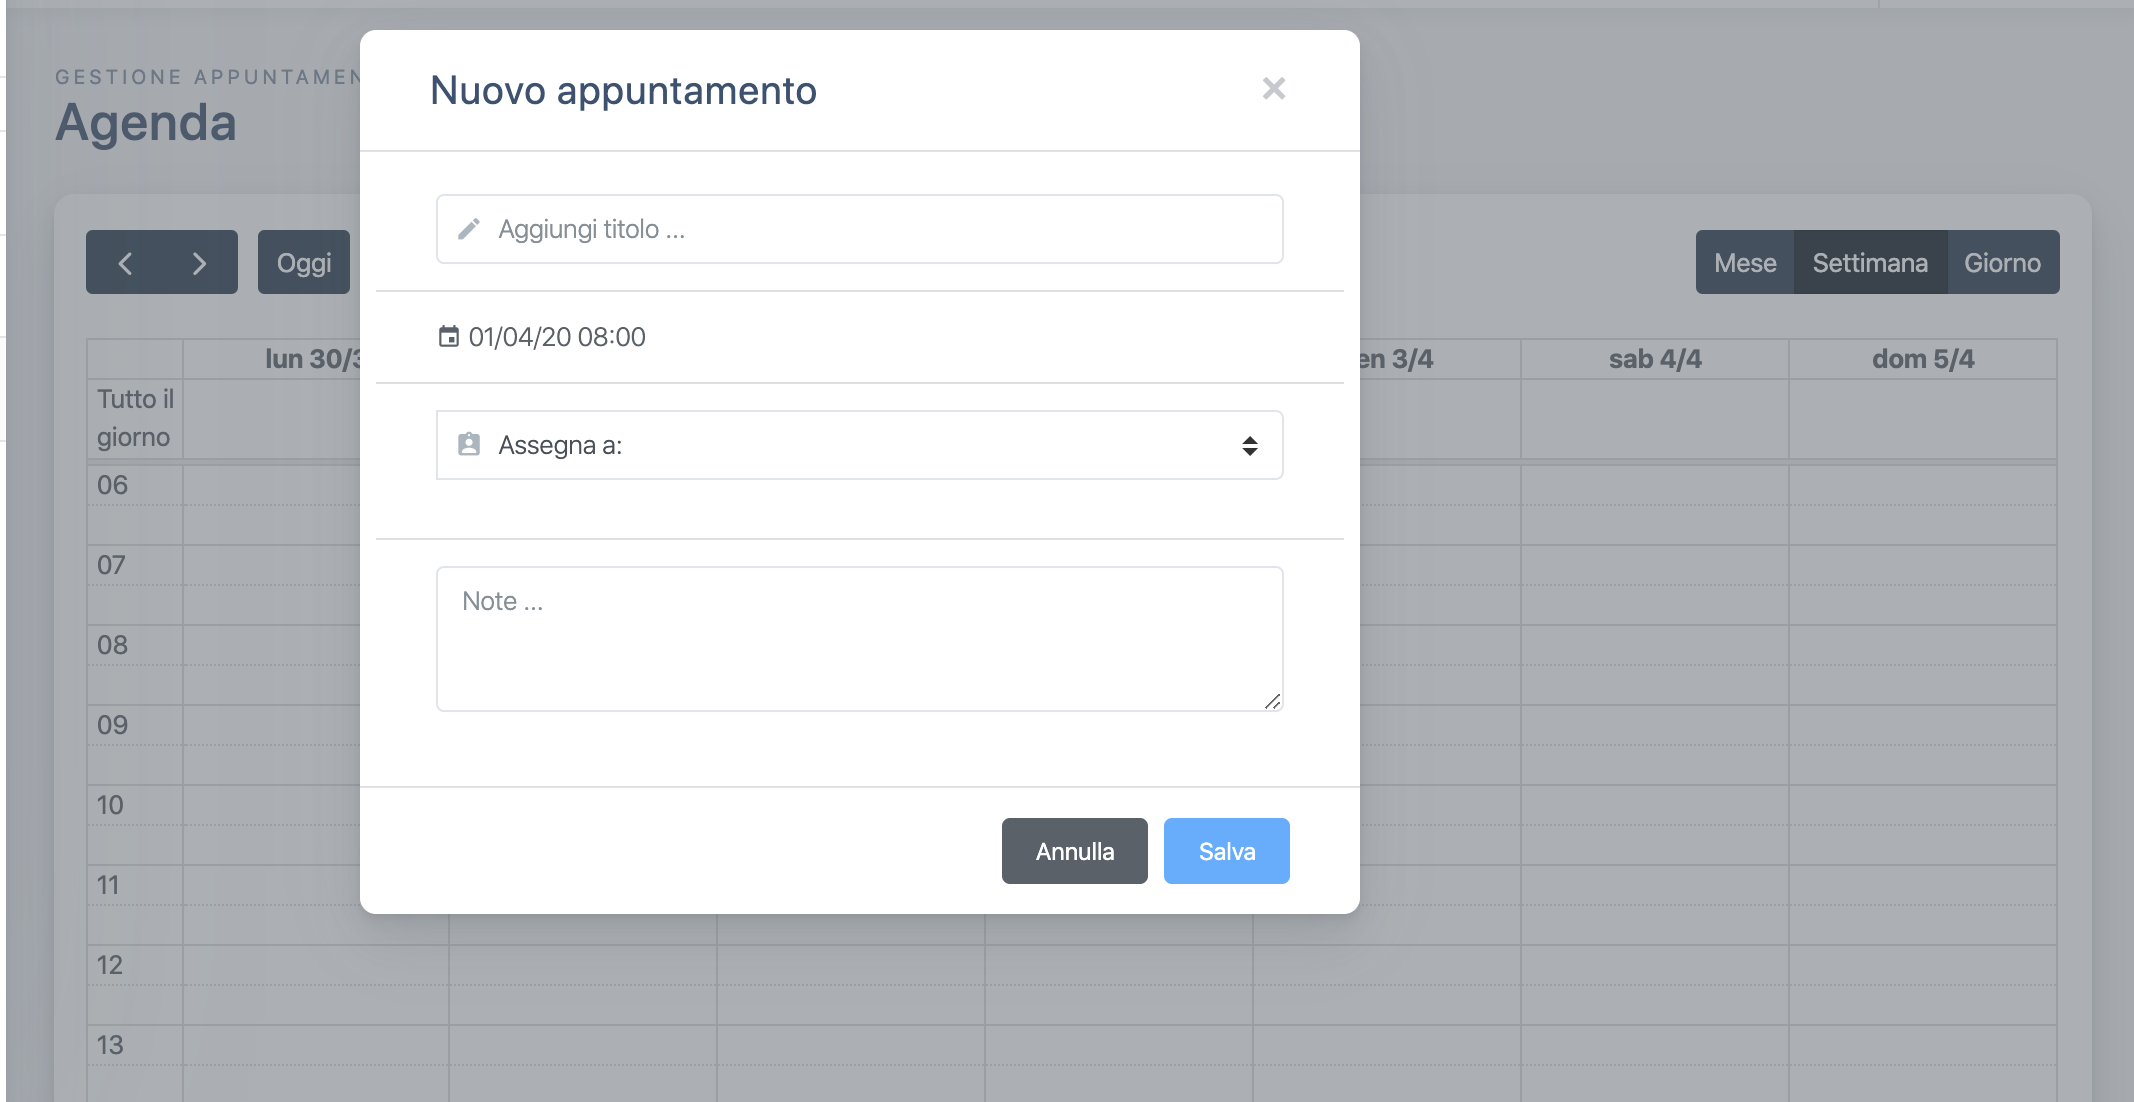
Let's use modals for a better UX
To solve this issue, I created a new component. I called it AddAppointmentModal (resources/js/components/AddAppointmentModal.vue).
Here's what it looks like (we are using traditional Bootstrap CSS here):

Ok, let's see the code:
<template>
<div v-if="show">
    <div class="modal fade show display" v-cloak tabindex="-1" role="dialog" aria-labelledby="AddAppointmentModal" aria-hidden="true">
        <div class="modal-dialog modal-dialog-centered" role="document">
            <div class="modal-content">
                <div class="modal-header">
                    <h5 class="modal-title">New Appointment</h5>
                    <button type="button" class="close" @click="closeModal" aria-label="Close">
                        <span aria-hidden="true">×</span>
                    </button>
                </div>

                <div class="p-2">
                    <ul class="list-group list-group-flush">
                        <li class="list-group-item">
                            <div class="input-group input-group-seamless">
                                <div class="input-group-prepend">
                                    <div class="input-group-text">
                                        <i class="material-icons">edit</i>
                                    </div>
                                </div>
                                <input type="text" class="form-control w-100 modal-title" v-model="event.title" placeholder="Add title ..." ref="eventTitle" autofocus>
                            </div>
                        </li>
                        <li class="list-group-item">
                            <i class="material-icons">event</i>
                            {{ formatDate(date.start) }}
                        </li>
                        <li v-if="users.length > 0" class="list-group-item">
                            <div class="input-group input-group-seamless mb-3" v-if="users.length > 0">
                                <div class="input-group-prepend">
                                    <label class="input-group-text" for="userSelect">
                                        <i class="material-icons">assignment_ind</i>
                                    </label>
                                </div>
                                <select class="custom-select" id="userSelect" v-model="event.assignee">
                                    <option disabled selected value="nobody">
                                        Assign to:
                                    </option>
                                    <option v-for="user in users" :key="user.id" :value="user.id">
                                        {{ user.full_name }}
                                    </option>
                                </select>
                            </div>
                        </li>
                        <li class="list-group-item">
                            <div class="form-group">
                                <textarea class="form-control" id="appointmentNote" rows="3" v-model="event.note" placeholder="Description ...">
								</textarea>
                            </div>
                        </li>
                    </ul>
                </div>

                <div class="modal-footer">
                    <button type="button" class="btn btn-secondary" @click="closeModal" data-dismiss="modal">
                        Annulla
                    </button>
                    <button type="button" class="btn btn-primary" @click="saveEvent" :disabled="!validEventData">
                        Salva
                    </button>
                </div>

            </div>
        </div>
    </div>
    <div v-cloak class="modal-backdrop fade show custom-modal-backdrop"></div>
</div></template>

<script>
export default{
	props: ['show', 'date'],
	    data: () => ({
	        event: {
	            title: null,
	            assignee: 'nobody',
	            note: null
	        },
	        users: []
	    }),

	    methods: {
	        closeModal() {
	            this.event.title = null
	            this.event.assignee = 'nobody'
	            this.event.note = null
	            this.$emit('close')
	        },

	        formatDate(date, format = 'DD/MM/YY HH:mm') {
	            return moment.utc(date).format(format)
	        },

	        transformEventDates(start, end) {
	            // if start is same as end add 1hr
	            let startTime = new Date(start)
	            let endTime = new Date(end)

	            if (startTime.getTime() === endTime.getTime()) {
	                let endTime = (new Date(end))
	                endTime.setHours(endTime.getHours() + 1)
	                return {
	                    start,
	                    end: endTime.toISOString()
	                }
	            }
	            return {
	                start,
	                end
	            }
	        },

	        saveEvent() {
	            let eventData = this.transformEventDates(this.date.start, this.date.end)
	            let newEventData = {
	                start: eventData.start,
	                end: eventData.end,
	                title: this.event.title,
	                assignee: this.event.assignee,
	                note: this.event.note
	            }

	            this.$api.appointments.create(newEventData)
	                .then(({
	                    data
	                }) => {
	                    this.closeModal()
	                    this.$emit('event-created')
	                })
	                .catch(error => {
	                    this.$emit('error')
	                })
	        }

	    },

	    computed: {
	        validEventData() {
	            return !!(this.event.title && this.event.assignee != 'nobody')
	        }
	    },

	    mounted() {
	        // I absctracted my API calls, this would be the same as:
	        // axios.get('/users').then( .... ) ...
	        this.$api.users.index()
	            .then(({
	                data
	            }) => {
	                this.users = data
	            })
	            .catch(error => {
	                this.users = []
	                this.event.assignee = null
	            })
	    }
	}
</script>
As you can see in the Calendar.vue code, there is an event handler called @dateClick="handleDateClick".
This takes care of displaying the modal for event creation.
🚨WARNING: I used some api abstractions to map my backend endpoint to the frontend. 🚨
Lines where you see this.$api.something can be replaced with axios.get(YOUR_ENDPOINT) or axios.post(YOUR_ENDPOINT).
🚨WARNING 2: In my code I gave the ability to admins to assign an appointment to other users, if you don't need this part, edit accordingly in AddAppointmentModal component and inside AppointmentController. 🚨
Editing and deleting appointments
Now that we can add new appointments to our calendar, we need a way to delete them or to update them.
In the previous code I shared with you, there's a component called ShowAppointmentModal.
When you click on an existing event, a modal with event details pops up.
From within that modal you can also edit or delete the appointment.
Appointment drag & drop, resizing
Thanks to FullCalendar's flexibility, you can drag and drop any appointment and it will be updated in the backend reflecting changes immediately on the frontend. If an error occurs, the appointment gets restored to its original time and date slot.
Same thing for appointment resizing, try it!
This is handled inside the Calendar.vue component:
<template>
<FullCalendar
  // ....
  @eventDrop="handleEventDrop"
  @eventResize="eventResize"
  :editable="true"
  // ...
/>
</template>
<script>
// ....
methods: {
    handleEventDrop(e) {
        let updatedEventData = {
            start: e.event.start,
            end: e.event.end
        }
        this.$api.appointments.update(e.event.id, updatedEventData)
            .then(({
                data
            }) => {
                new Noty({
                    text: `Event has been updated.`,
                    timeout: 700,
                    type: 'success'
                }).show()
            })
            .catch(error => {
                e.revert()
                new Noty({
                    text: `Oops, something bad happened while updating your event.`,
                    timeout: 1000,
                    type: 'error'
                }).show()
            })
    },
    eventResize(e) {
      let updatedEventData = {
        start: e.event.start,
        end: e.event.end
      }
      this.$api.appointments.update(e.event.id, updatedEventData)
        .then( ({data}) => {
          new Noty({
            text: `Appointment duration updated.`,
            timeout: 1000,
            type: 'success'
          }).show()
        })
        .catch( error => {
          e.revert()
          new Noty({
            text: `Oooops, couldn't update appointment duration. Sorry.`,
            timeout: 1000,
            type: 'error'
          }).show()
        })
    },

    rerenderCalendar() {
      this.$refs.fullCalendar.getApi().refetchEvents()
    }
}
</script>
Hope you enjoyed this article.
Code is self explaining but might you have any question feel free to contact me on twitter @thugic or drop me an email hello@zako.dev
